

How To Create An AWS EC2 Instance: simplified step by step guide for beginners


Before we understand how to launch an instance, its safe to say that most beginners do not fully understand what an EC2 instance or its function is. So let us begin by defining an Amazon EC2 instance.
An Amazon EC2 instance is a virtual server in Amazon's Elastic Compute Cloud (EC2) for running applications on the Amazon Web Services (AWS) infrastructure.
The instance will be charged based on the instance type and the cost is calculated per hour or by rounding the duration of usage to the nearest hour. Therefore the good news is that you pay on-demand.
Launching EC2 instances is a very basic task any AWS cloud user could perform but the process for creating an EC2 instance when using AWS can become quite complex.
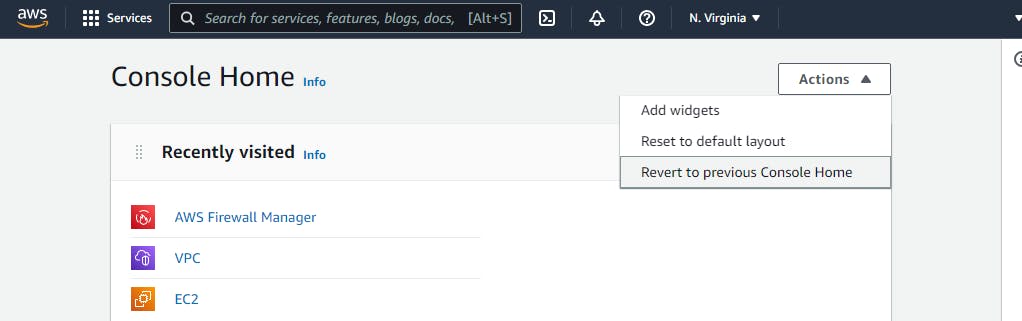
This procedure will be described sequentially using the old AWS console, you can easily switch to that by clicking the AWS logo on the upper left to get to Console Home, then click the actions button to expose the drop-down menu as shown in the image below:
The following steps include easy guide for creating an EC2 instance:
STEP 1-Login and access to AWS services
Login to your AWS account and go to the AWS Management Console tab.
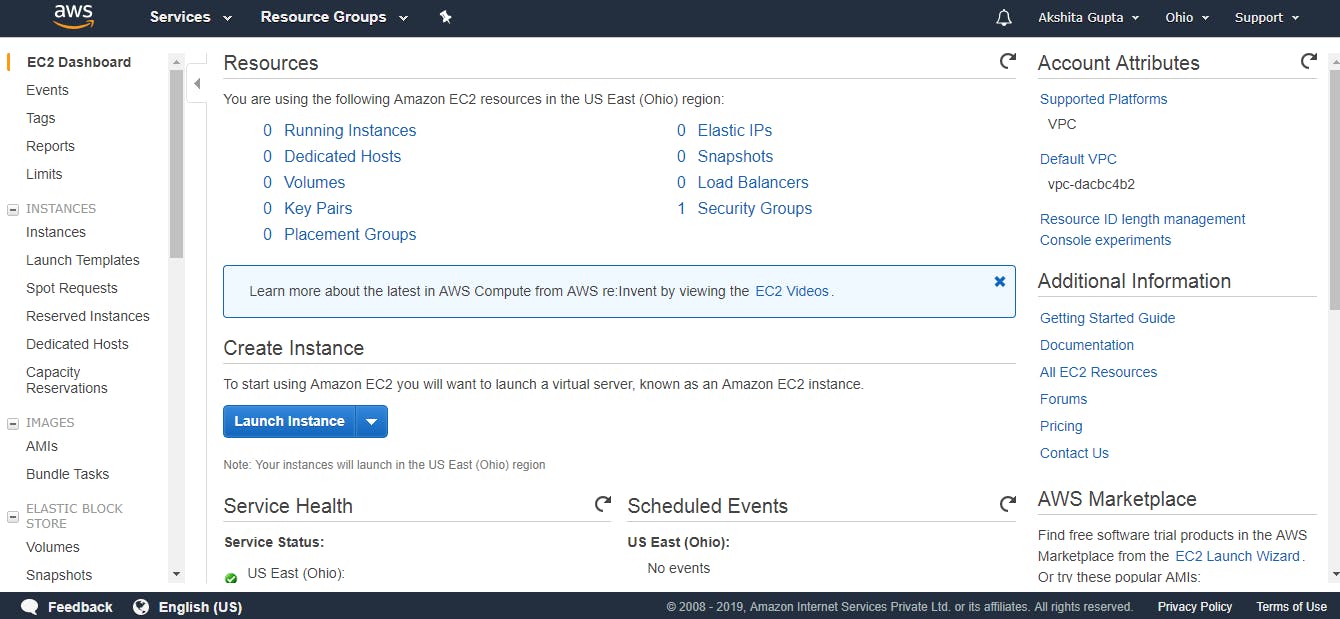
STEP 2-Navigate to the EC2 service.
Click on the EC2 service then hit 'Launch Instance' button to create a new instance.
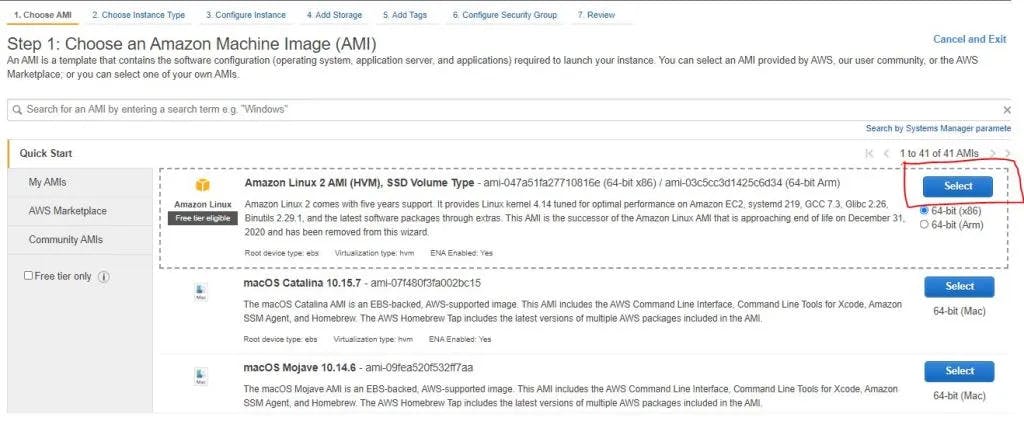
STEP 3- Choose an Amazon Machine Image (AMI)
An AMI is a base server image stored in the cloud (Figure 3). It contains the OS, preinstalled software as well as data included in the EC2 instance when it launches. You must specify an AMI when you launch an instance. You can launch multiple instances from a single AMI when you require multiple instances with the same configuration. We are going to be using Amazon Linux 2 cause its free tier so you won't be charged for service you only needed for learning purpose.
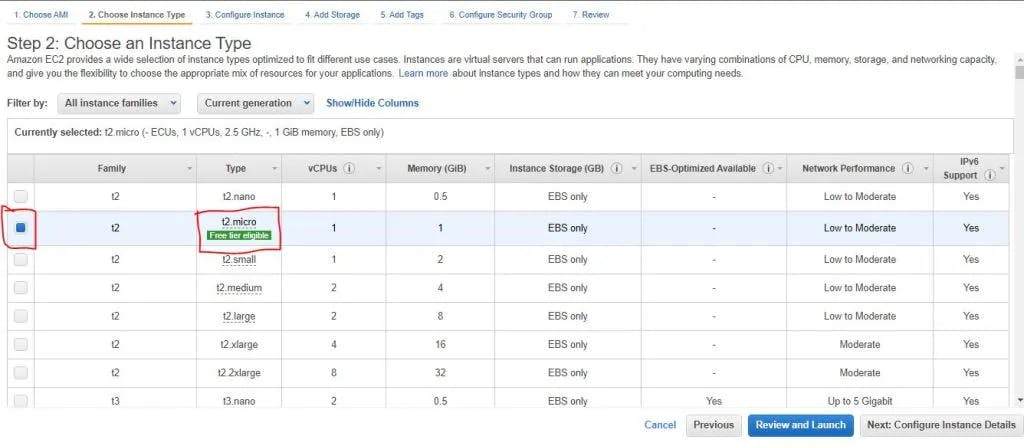
STEP 4- Choose an instance type
Once you have chosen your instance, click to the next step at the bttom right which leads to choosing an instance. In choosing the instance type you must select the appropriate one that matches your workload and also consider saving cost. Again we will go with the free tier, also for the same reason as before.
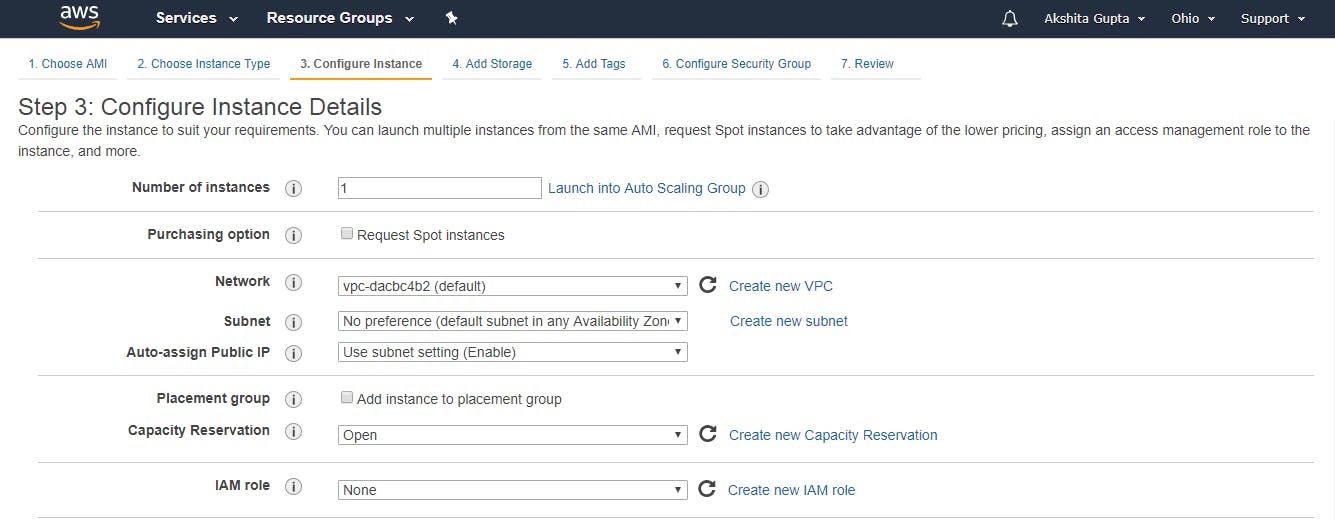
STEP 5-Configure Instance Details
After selecting the instance type, proceed to the Configure Instance Details section as seen in the image below. This section includes the following:
Number of Instances: It indicates how many EC2 instances you want to create. I leave it as 1 as I want to create only one instance.
Purchasing Option: Here, you need to set the price, request from, request to, and persistent request. Right now, I leave it as unchecked.
Network: Choose your network, set it as default, i.e., vpc-dacbc4b2 (default). VPC stands for virtual private cloud where we can launch the AWS resources such as EC2 instances in a virtual cloud.
Subnet: A subnet is just a range of IP addresses. All the devices in the same subnet can communicate directly with one another without going through any routers In a specified subnet, you can add new AWS resources. You can also set it to the default subnet. it is going to be assigned a public IP automatically.
IAM Role: IAM means Identity and access management. An IAM role is an IAM identity that you can create in your account that has specific permissions. It is an AWS identity with permission policies that determine what the identity can and cannot do in AWS.
At this point you are expected to create an IAM role, so we go ahead and right click on 'create new IAM role', which leads you straight into the IAM management console where you will again click on 'create role'. Next we will be asked to choose the service that will use this role and out of the many options presented we will be choosing EC2. Click next and go to permissions, here you will type in SSM and choose AmazonEC2roleforSSM. SSM is Simple System Manager and its function is to allow gain access into the machine. Now proceed to the next page that says Review and give the role a name, hit create and voila! we have created an IAM role. You will now go back to the configuration page, click refresh and your new IAM role will fill in the box.
Shutdown behavior: It defines the behavior of the instance type. You can either stop or terminate the instance when you shut down the Linux machine. Now, I leave it as Stop.
From here on we leave everythin as either blank or default
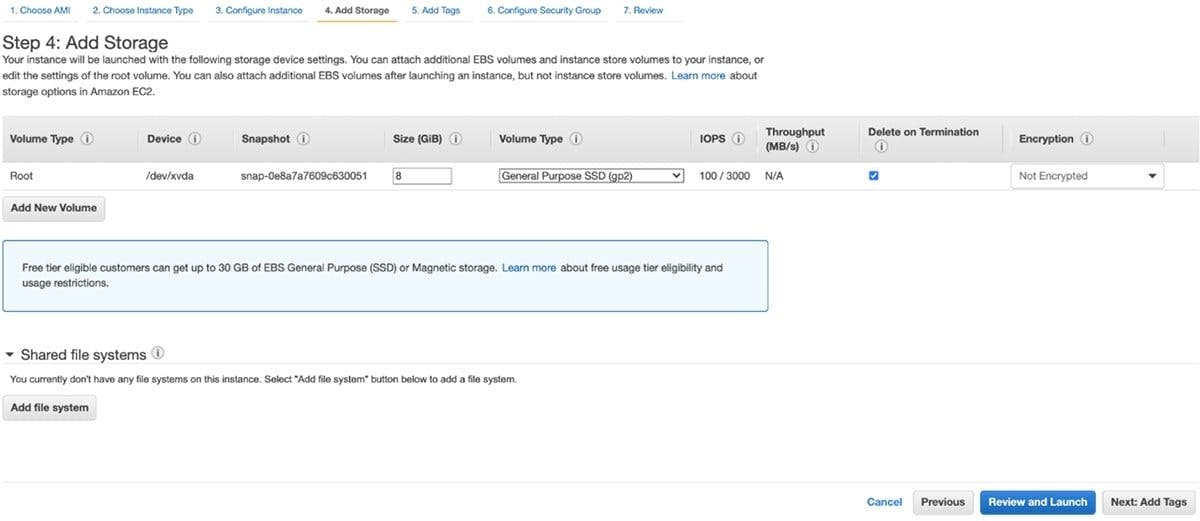
STEP 6- Add Storage
Here you are required to choose how much storage you want and since this is still for learning purpose we are still going to leave the boxes as default.
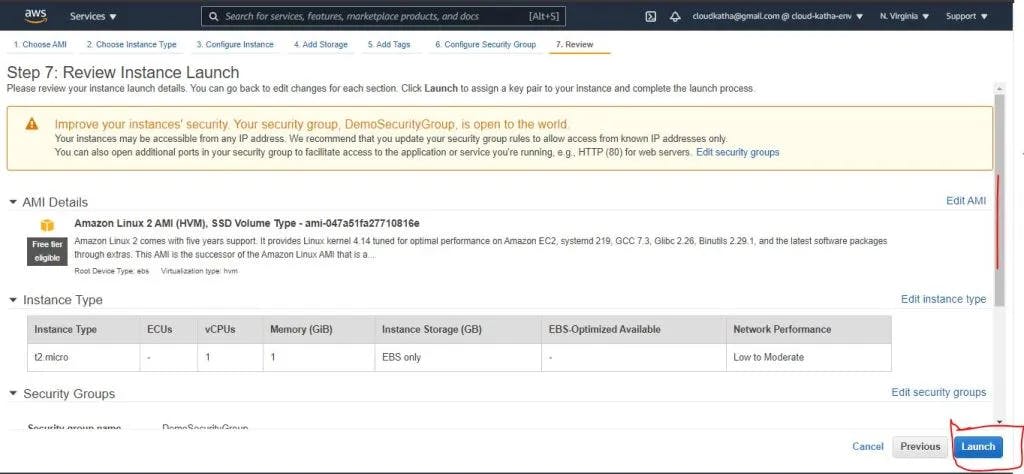
STEP 7- Review Instance Launch
In this step, all you need to do is hit Launch as highlighted in the image below, then you will be asked to create a key pair, this leads us to step 8.
STEP 8- Create a Key Pair
I'm sure you are puzzled by the term Key Pair and that's okay because I was too. A key pair consists of a public key(EC2 stores) and a private key(you store), it is a set of security credentials that you use to prove your identity when connecting to an Amazon EC2 instance. You use the private key to gain access into the server.
So to create a new one: Select Create a new key pair option – > name your key pair -> Download Key Pair -> Launch Instance
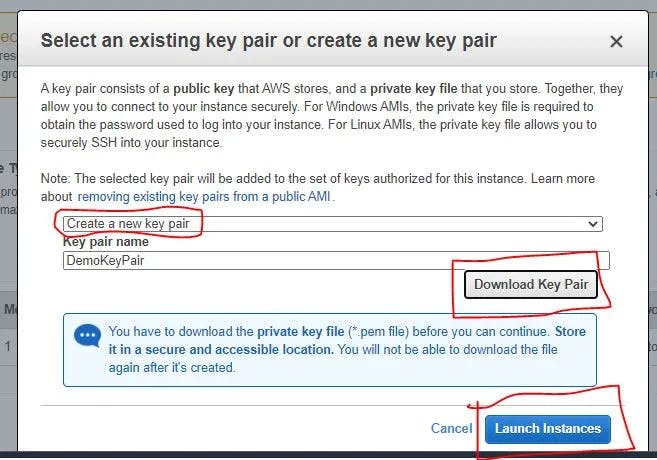
But it's important to note that all of this will not be necessary since we are using SSM, so we will click on 'proceed without a key pair', then go ahead and launch the instance.
The next page says 'Launch Status' as shown in the image below:
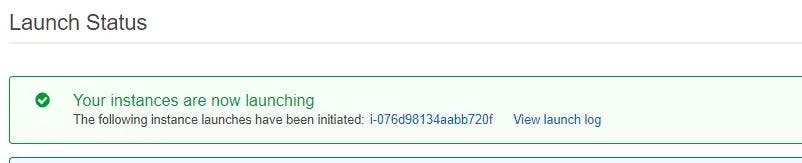
Scroll down the page and click on View Instances it will look like this:

Once launched, You can see the list of your running instances.
SUMMARY
With this simplified step by step guide, you are able to create an AWS EC2 instance with ease. Remember to terminate your instance once you are done, otherwise AWS will wire you billing wotowoto, lol. If you have any questions whatsoever, please you are welcomed to ask in the comments.