A Beginner's Guide To Git & Github
Understanding the Basic Git Commands and Functions

Objective What is Git?
Git is a free, open-source version control software. This basically means that Git is a content tracker. So Git can be used to store content — and it is mostly used to store code because of the other features it provides.
What’s a version control system? Real life projects requires many developers to add code in parallel. Therefore Version Control System helps in handling this by maintaining a history of what changes have happened.
Essentially, it’s a system that allows you to record changes to files over time, thus, you can view specific versions of those files later on. Again, a version control system allows developers to revert and go back to an older version of their code.
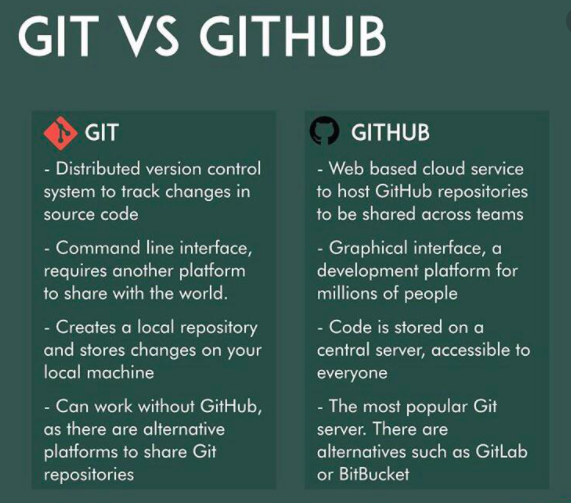
Git Vs Github
Most beginners usually have a hard time figuring out the difference between Github and git, well we are going to simplify and differentiate the two with the use of the table below:
Git Repositories A repository contains the entire collection of files and folders associated with a project, and contains as well the file's revision history. When working with git, there are 3 types of repositories you have to deal with:
1- Local repository — When you are working on your local machine that working directory is your local repository.
2-Remote repository — Remote repositories are versions of your project that are hosted on the Internet or network somewhere. Such remote repositories are GitHub and BitBucket.
3-Upstream repository — It is the Parent/Original repository from where you forked your repository. Then , forked one will act as a remote repository.
Fork
When a Git repository is forked, a completely new copy of the target repository is created. The developer who performs the fork will have complete control over the newly copied codebase. Previous contributors automatically have no access to contribute to or synchronize with the Git fork unless the developer who performed the fork operation grants access to them.
Clone
A cloned repository is not controlled by the developer who clones it, the target repository remains shared amongst all of the developers who had previously contributed to it. How to clone a repository:
- Go to your remote repository and copy the link as shown below.
- Then give the following command in terminal in where you want to create the local repository.
- Make sure that you have installed Git into your machine before.
Git Life Cycle
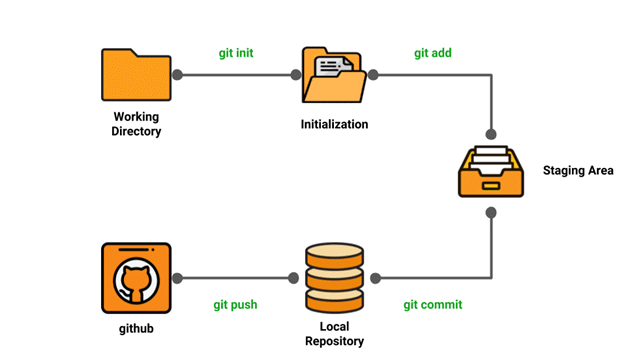
Local working directory: Our project resides in the first stage of a Git project life cycle known as the local working directory, consists of files that you are currently working on.
Initialization:
In order to initialize a repository, we run the command git init', this command functions to notify Git of the project file in our repository.
Staging area:
To stage a file is simply to prepare it finely for a commit. For example: John is working on two features – one is finished, and the other needs modification. John would like to make a commit and go home but wouldn’t like to commit the parts of the second feature, which is not done yet. So he stages the parts that belong to the first feature, and commit.
Commit
A commit functions like taking a photo, they are snapshots of your entire repository at specific times. It is a way of recording change history in a git repository and to save your changes to the local repository.
Git Commands
In order to use git, they are basic commands that developers need to run and here we are going to mention them and explain their functions:
Git init: This command converts our directory to a Git repository therefore Git tells us it has created a .git folder in our project’s directory which we can see when we run the command: ls-a.
> [git init]Git status: This command returns or displays the current state of the repository. If a file is in the staging area, but not committed, it shows with git status. Or, if there are no changes it’ll return nothing to commit, working directory clean.
> [Git status]
Git add: This command adds files to the staging area. As discussed earlier, Git tracks all of thechanges that happen in the repository, so before a file is available to commit to a repository, the file needs to be added to the staging area. After the staging area (the add process) is complete, we can check whether the files are successfully added or not by executing the git status. The result should be similar to that in the image below:
> [git add <file or directory name>](>
Git commit: This command records the changes made to the files to a local repository. It'srequired for every commit to have a message describing what changed so that it will be easy to navigate our history in the future.
> [git commit -m,]where -m represents the message in quotes.
Git push: This command is commonly used to upload local commits to a remote repository.
> [git push]
However if you also need to upload the branch too, then use the following command
> [git push origin master]
Git pull: This command gets the latest version of a repository. This pulls the changes from theremote repository to the local computer.
> [git pull <branch_name>]- Git branch: This command shows the branches being worked on locally. There are severalcommands one can run under git branch and there are:
create a new branch
git branch ]
list all remote or local branches
git branch -a]
- delete a branch
git branch -d ]
Git merge: This command is used to merge changes made from one branch into another. Wehave two branches, master branch and dev_function. The latter has the latest update, therefore want to bring its contents into the master branch by using *git merge.
Firstly we switch to the branch we want to merge into, Then type:
> [git checkout master](Link)Followed by [git merge dev_function](Link)
- Git checkout: To start working in a different branch, use git checkout to switch branches. Checkout an existing branch git checkout ]
Checkout and create a new branch with that name git checkout -b ]
- **Git Remote: This command is used to connect a local repository with a remote repository. To create git remote, one can use one of these services: Github, Bitbucket and Gitlab.
Add remote repository [git remote ]
List named remote repositories git remote -v
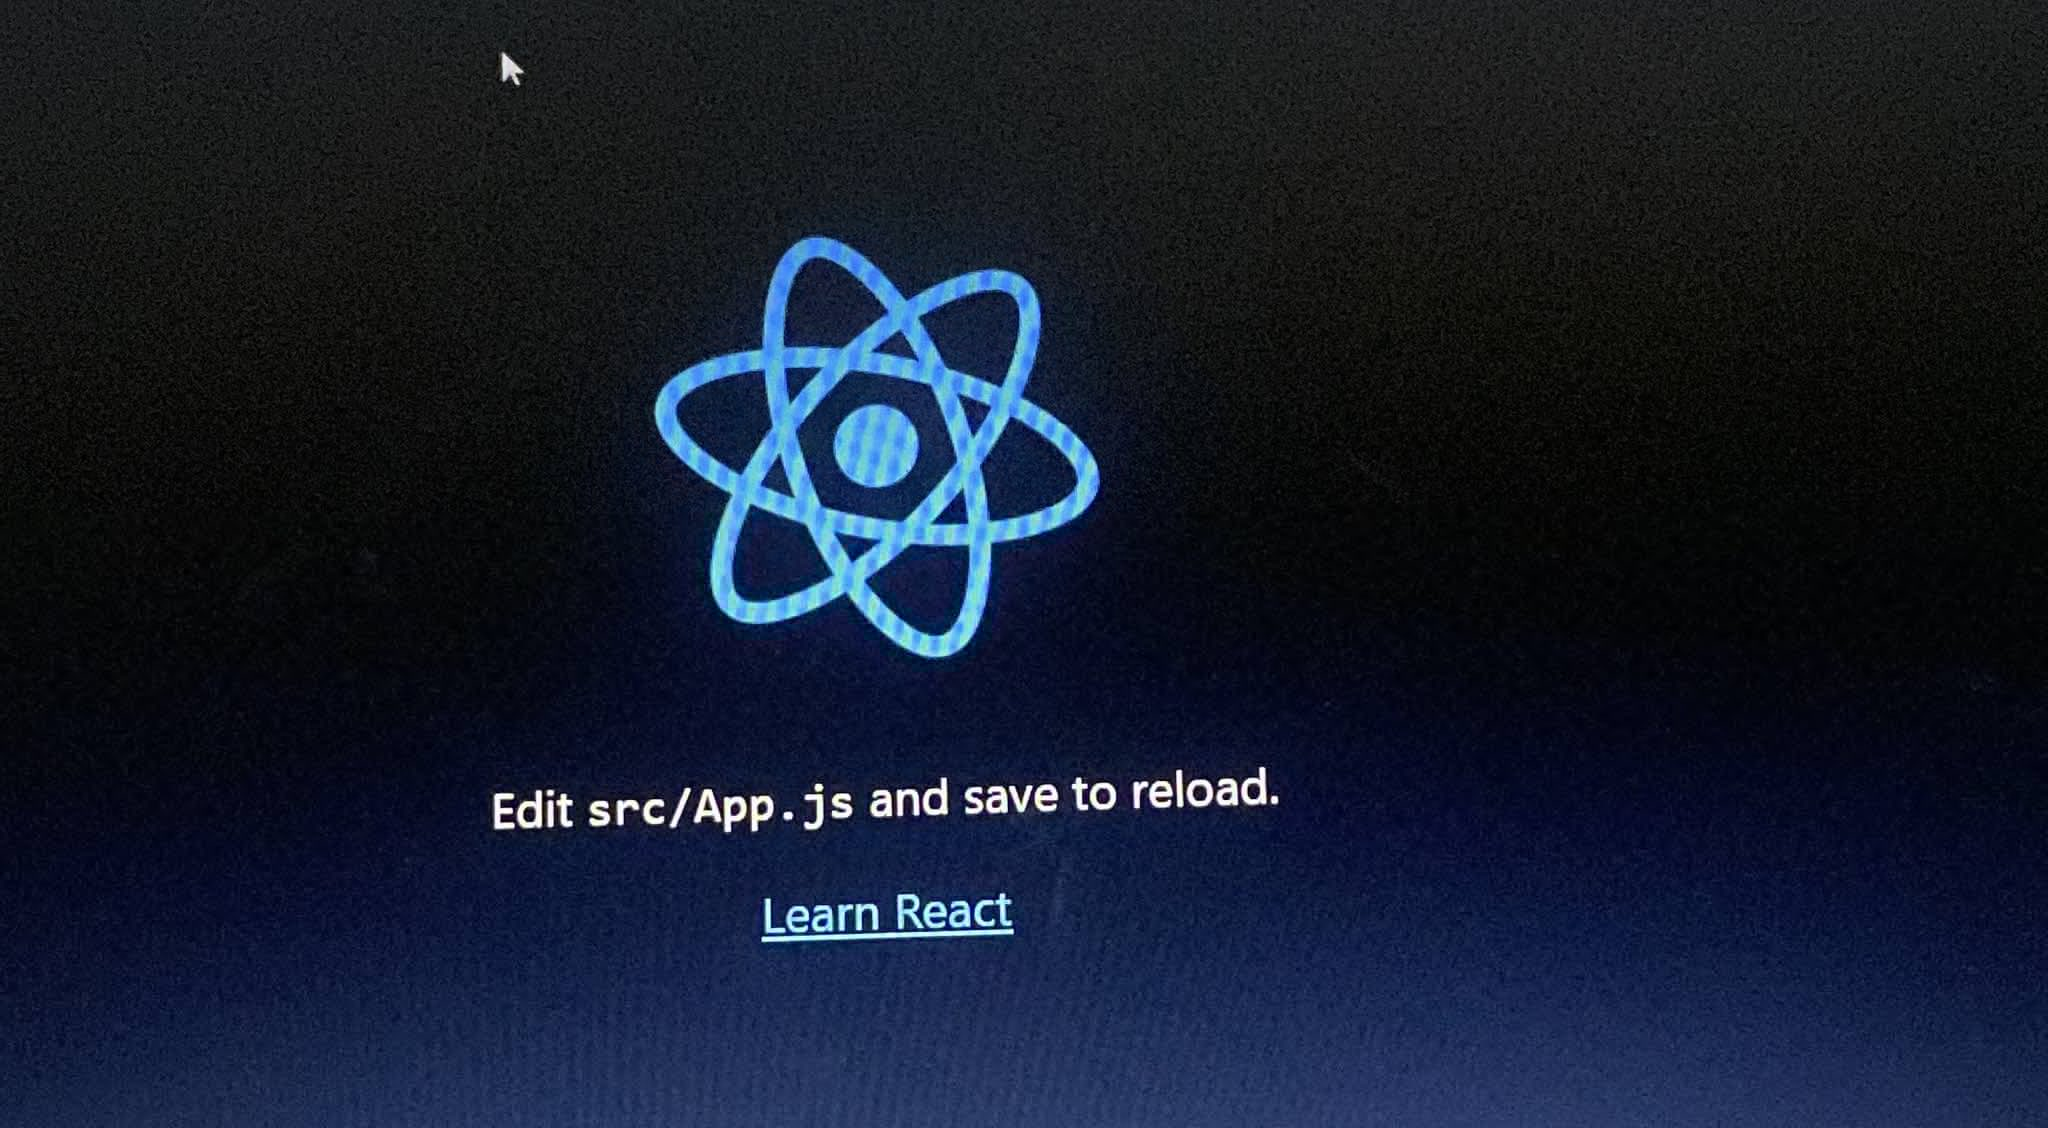
How to Create a React App
In order to practice the basic commands listed above, we are going to create a react app.

React, also referred to as React.js, is an open-source JavaScript library designed by Facebook, used for building user interfaces or UI components. According to the creator of React JS, Jordan Walker, React is an efficient, declarative, and flexible open-source JavaScript library for building simple, fast, and scalable frontends of web applications.
Prerequisites In order to create a react app, you'll need to:
- Create a github account by going to github.com/join.
- Install node js, You can download this onhttps://nodejs.org/
- Install visual studio code, also known as VScode.
Then we begin:
Create a folder on your file explorer with the name 'React Project'.
Then open your VScode and click on 'File', you will see a list of options, then select 'open folder'. At this point you will open the newly created folder on your VScode.
Click on terminal, then run this command
npx create-react-app my-react-app
This creates the react app and choose a location where its creating it.
- Start the react app, we do this using this command:
Create a remote repository on github: In order to push this app from your local repository to the remote repository, first begin by creating a remote repository on github.
Click on the plus sign on the top right corner and select 'new repository'.
Fill in the box with a name of your choice, set it to public so that anyone can see it and then leave the rest blank for now since we are creating an empty repository.
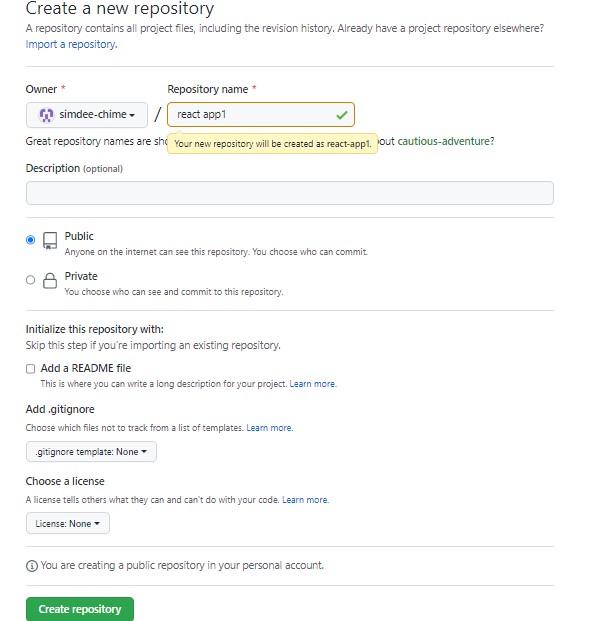
The remote repository has been created.
On your terminal, run the git init command to create a repository on your terminal.
Run git add . to stage all files and if you run the git status command, you will notice that all files have been added to the staging area.
Run the git commit -m to commit all files, this will save all changes to the local repository and remember to add a message, you could add sth like "first commit".
Now in order for the change to reflect on the remote repository, we have to push the changes from the local repository to the remote repository using the command git remote add origin and URL of the remote repository which you can copy from the page represented below:
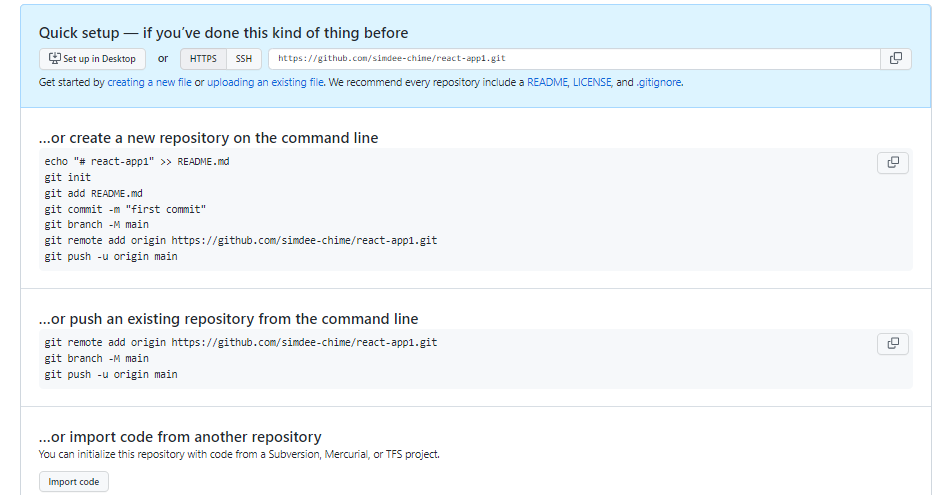
Then to finally execute the push, you run git push -u origin master
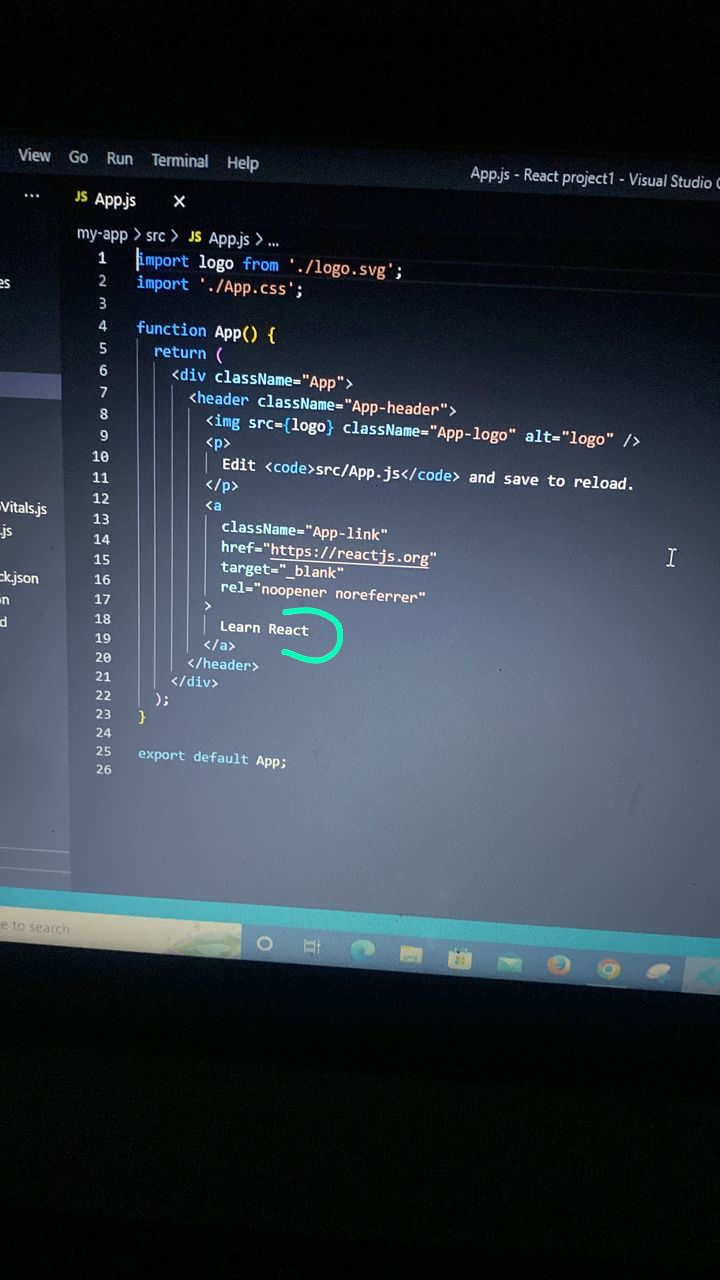
- On the terminal, press 'i' on the keyboard and make an edit to your code. In my case I changed the “Learn React” to "cloud/DevOps".