Create And Configure Your Very First Virtual Private Cloud On AWS

Objective By the end of this article you will be able to understand:
- What a VPC is and why we need one.
- Create a VPC- Create public and private subnets
- Create an internet gateway
- Configure a route table and associate it to a subnet
VIRTUAL PRIVATE CLOUD
A virtual private cloud is a virtual network in the AWS cloud that’s logically isolated from other networks.
You have control over IP address ranges and subnets inside of your VPC.
The most well-known use of VPCs is connecting EC2 instances together and to other AWS services and networks, including the internet.
Here's an illustration: A restaurant is packed with crowd meanwhile another section of the restaurant has reserved tables for other customers therefore it's less crowded. The reserved section represents a virtual private cloud inside the public cloud (restaurant). But this section can only be accessed by diners who have made a reservation.
Same way, A VPC similarly reserves some of the public cloud’s resources for use by just one customer. The Amazon Virtual Private cloud (VPC) service provides the backbone for many AWS services. It is your own network inside the cloud.
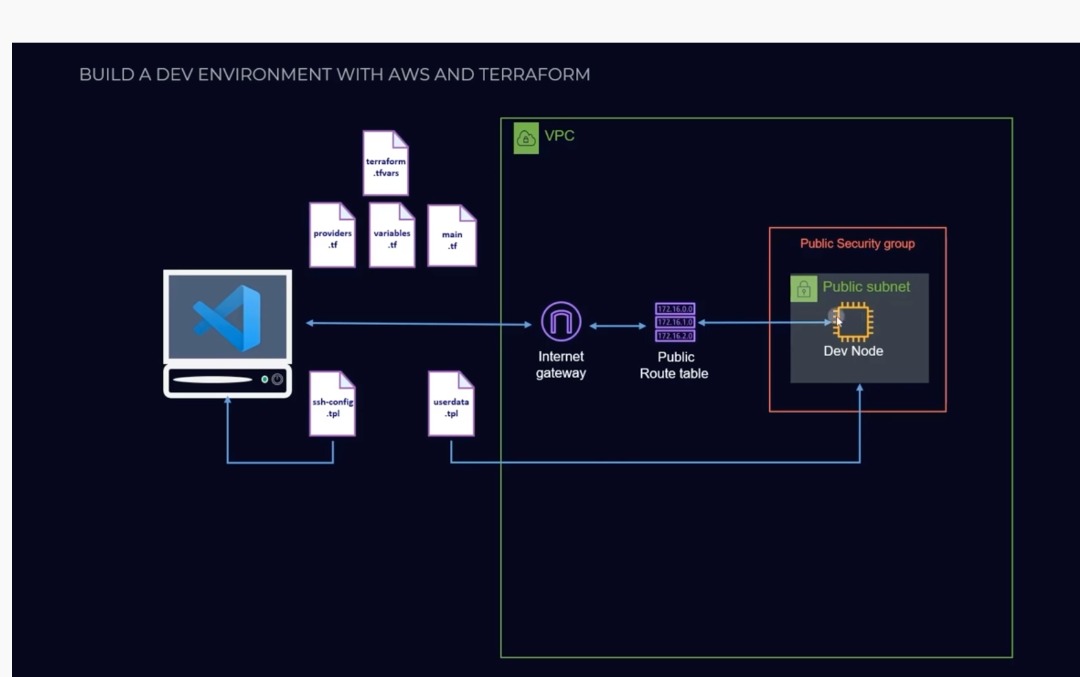
The above diagram is a representation of a VPC. Each VPC divides into one or more subnets. A subnet functions to provide logical separation and isolation of resources within the same VPC. We have a public and private subnet.
A private subnet is for resource that are not accessible to the internet, e.g your database, while the public subnet is for resources that are accessible from the internet e.g web servers.
Let us now discuss how to create a VPC on the AWS cloud using the AWS management console. They are also different components that are under VPC which we will also create.
How To Create Aws VPC
STEP-1
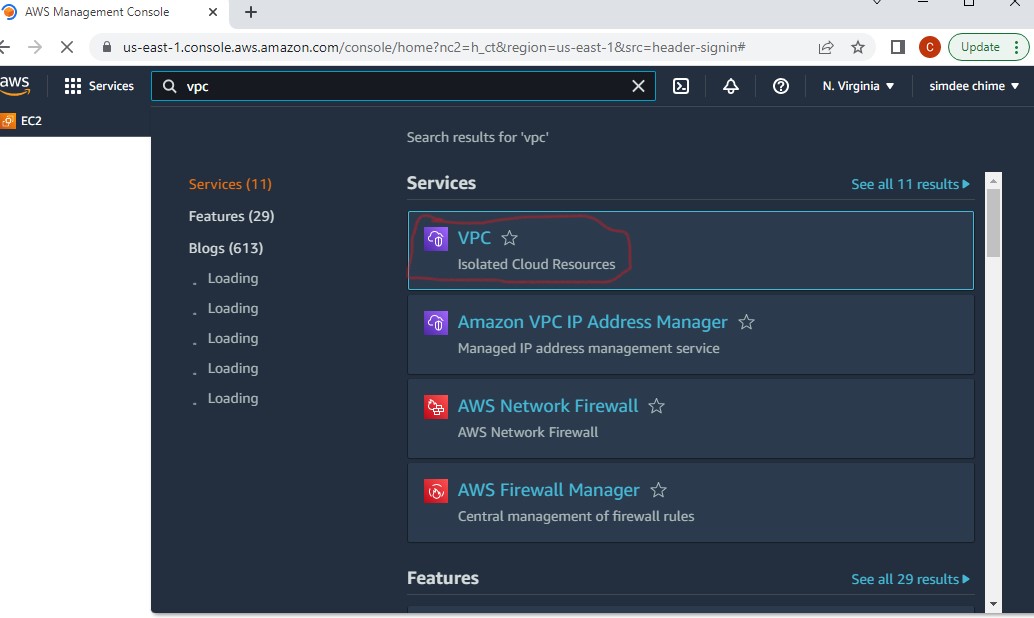
First, log into the AWS management console and go to the VPC service from the search bar.
STEP-2: Click on 'Your VPC' on the left panel.**

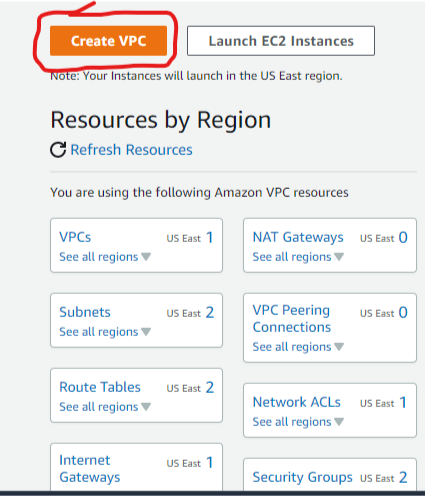
STEP 3: Click on Create VPC
It will open to a page where you are required to fill in the details of the VPC which involves the Name tag for the VPC, IPv4 CIDR block, IPv6 CIDR block, and Tenancy of the VPC. As shown in the image below:
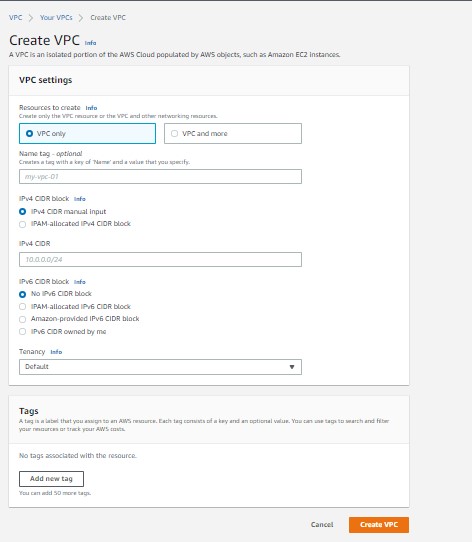
From the image above, for learning purpose the empty boxes can be filled as follows:
Name tag for the VPC: you can choose any name of your choice eg sample vpc-01
IPv4 CIDR block: set as default
IPV4 CIDR: For every instance launched under a VPC, an IP address is attached to it. Each VPC requires a Classless Inter-Domain Routing (CIDR) block to define the range of (IPv4) addresses that resources within the VPC can use. By clicking on this link below, you can choose the CIDR of your choice from a table containing a list of usable IP addresses and the CIDR it falls under.
[https://www.freecodecamp.org/news/subnet-cheat-sheet-24-subnet-mask-30-26-27-29-and-other-ip-address-cidr-network-references/]
By the time you are done choosing your IPV4 CIDR should look like this: 10.0.0.0/-- (/-- is the CIDR of your choice). For learning purpose, we could use 10.0.0.0/16
IPv6 CIDR block: set as default as we are disabling IPV6 CIDR.
Tenancy: defines that all the instances launched inside the VPC will run on single-tenant or dedicated hardware. Set as default option for the tenancy.
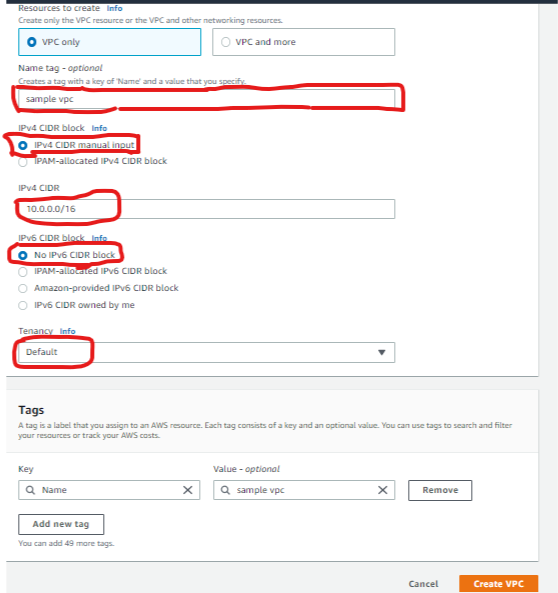
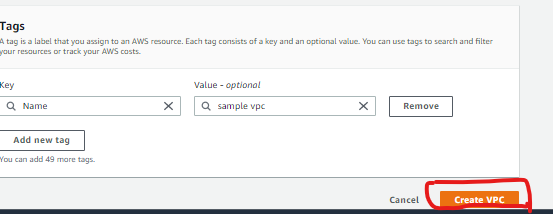
- Then click 'Create VPC'
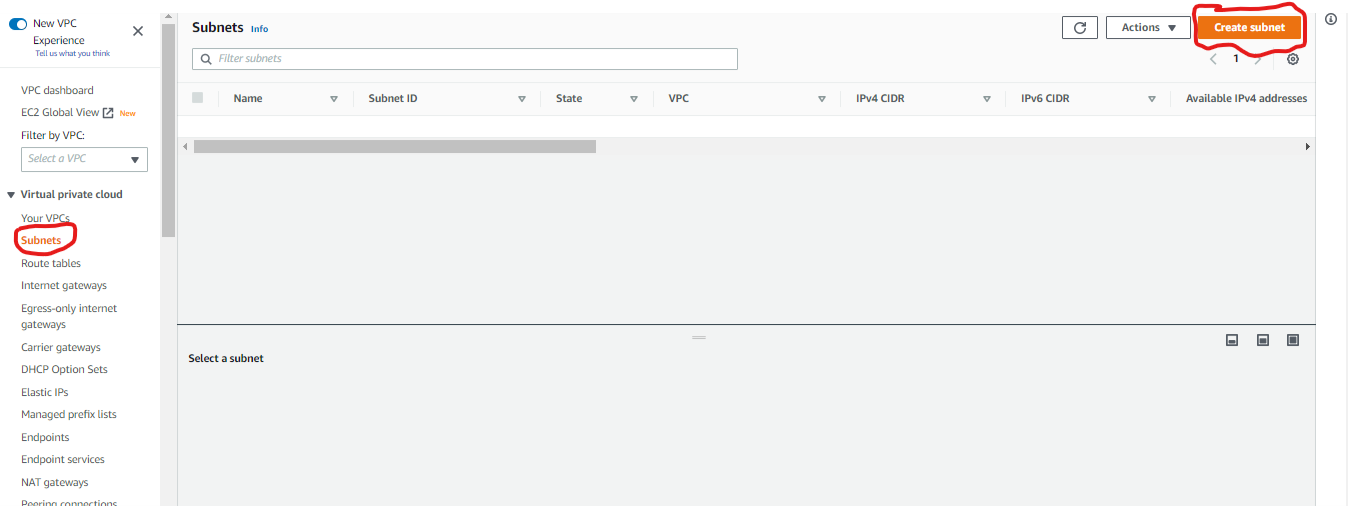
STEP 4 : Create Subnet
Just like the VPC, you must define a CIDR for each subnet. The subnet CIDR must be a subset of the VPC CIDR since a subnet is a division of CIDR. Here we will create 2 private subnets and 2 public subnets.
From the VPC Dashboard
- click on Subnets option
- click on Create Subnet
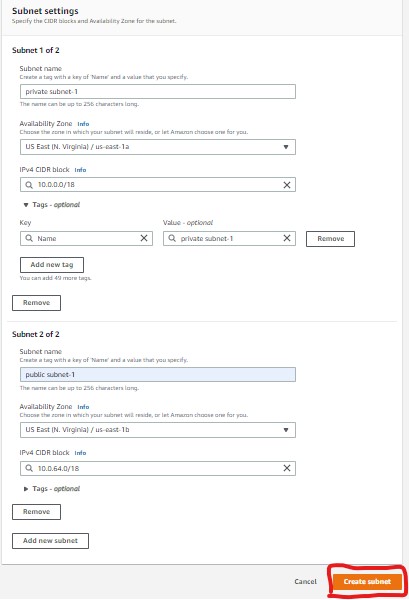
It will open up to a page where you are required to specify these options: -Subnet name: as “subnet1” or any name you choose
-VPC: you will enter the already existing VPC that you just created.
-Availability zone: as per your region
-IPV4 CIDR: let's get a bit extensive here. So the shortcut for filling this option is simple.
You can click the link below to generate as many IPV4 CIDR as required for your VPC. [https://www.davidc.net/sites/default/subnets/subnets.html?network=10.0.0.0&mask=20&division=23.f42331]
- All you have to do is insert your CIDR in box that says **'Mask bits',
- click update and divide.
There! it generates valid IPV4 CIDR for you subnets.
Repeat the same actions for the second public subnet and 2 private subnets, the only difference is in the availability zones and name tags. You must specify the public and private subnets by their name tag.
- Then hit create subnet as in the image below:
STEP 5
Create Internet Gateway
Go to VPC dashboard
- Select Internet Gateways
- Select Create Internet Gateway
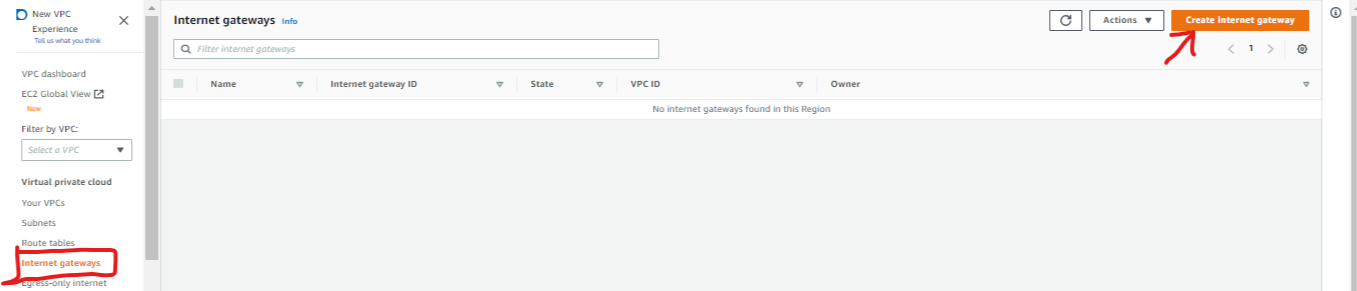
For example: Name tag- Public subnet-01 internet gateway
- Then click Create internet gateway. You have now created an internet gateway, lets now associate it with your VPC.
- Click on Actions.
- Select Attach to VPC
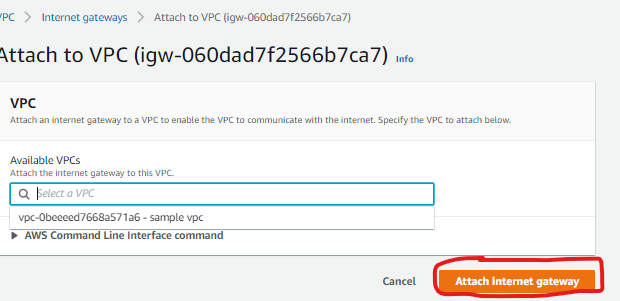
- Select your VPC; here my VPC is vpc-0beeeed7668a571a6
- click on Attach
Now your internet gate way is attached to your VPC.
STEP 6 Create Route Table and associate it with your VPC
From the VPC dashboard
Click on Route Table, Click on 'Create Route Table'.
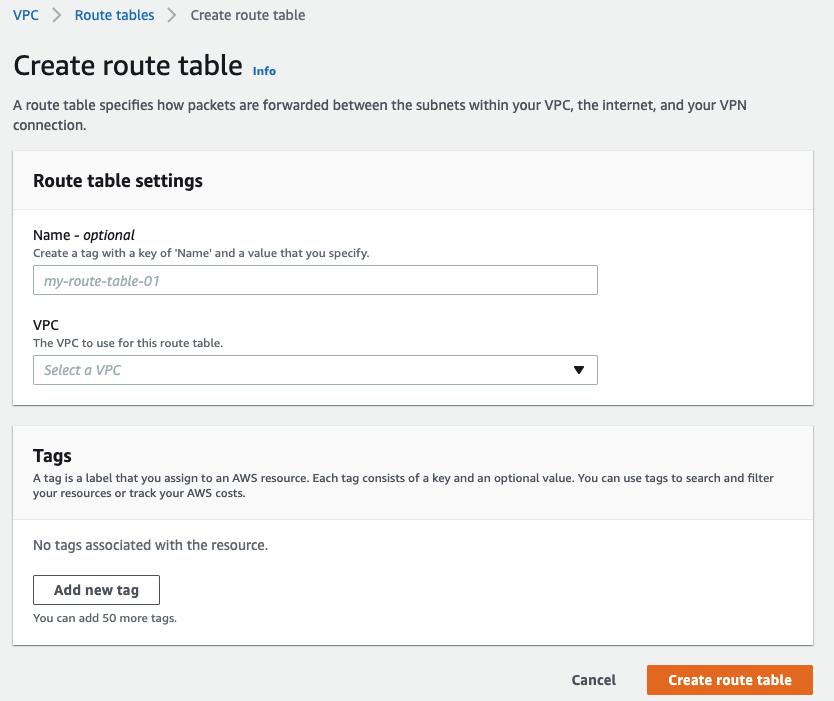
Specify the Name of Route Table and Select your VPC.
After the VPC has been created, the next step is to associate it to a subnet. Here we will associate it to the public subnet:
click on Edit
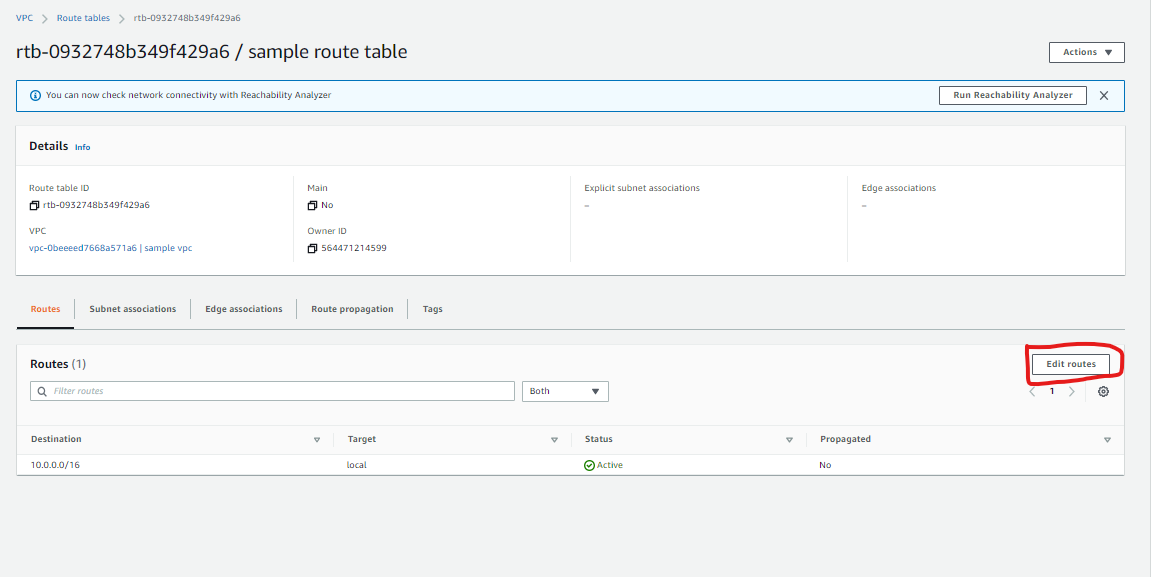
In the Edit routes page, the route table will contain an already existing route for resources within the network. Add a new route with destination 0.0.0.0/0 and select the internet gateway as its target. 0.0.0.0/0 means that all destinations not known to the route table will be routed to the internet gateway.

- Go to Subnet associations
- choose edit subnet associations Once you are taken to the page, select the public subnet and choose save associations.
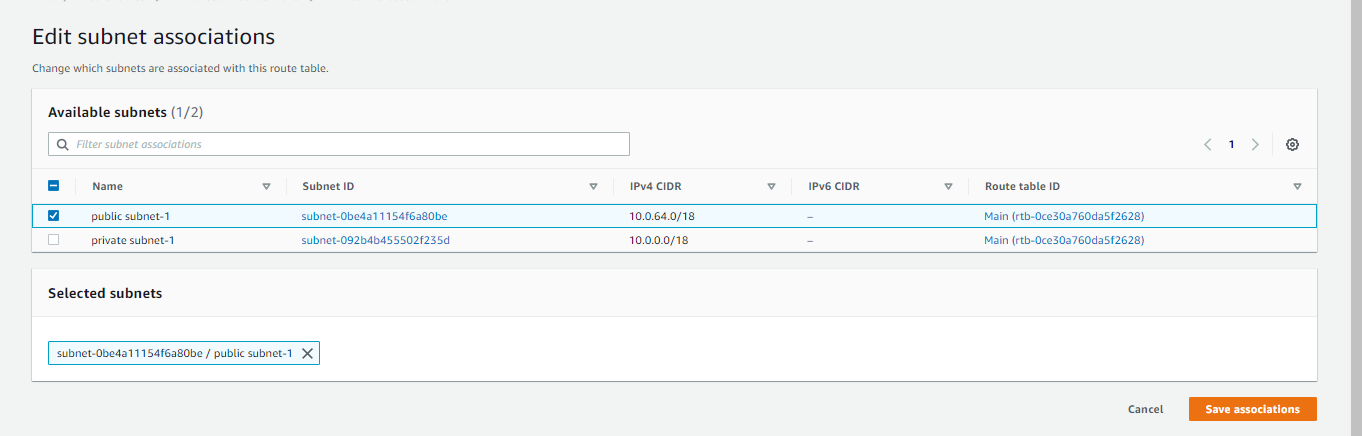
You now have a public (Internet-facing) subnet because it has a routing config that can route Internet-bound traffic correctly.
STEP 7: Launch an Instance Using the Instance and Create a Public Security Group
Whenever we login to our AWS(Amazon Web Services) account a default VPC is created with the CIDR (172.31.0.0/16). So we are going to launch an instance using this customized VPC, its assumed you know the steps on how to create an EC2 instance but if I have published a simplified article on that.
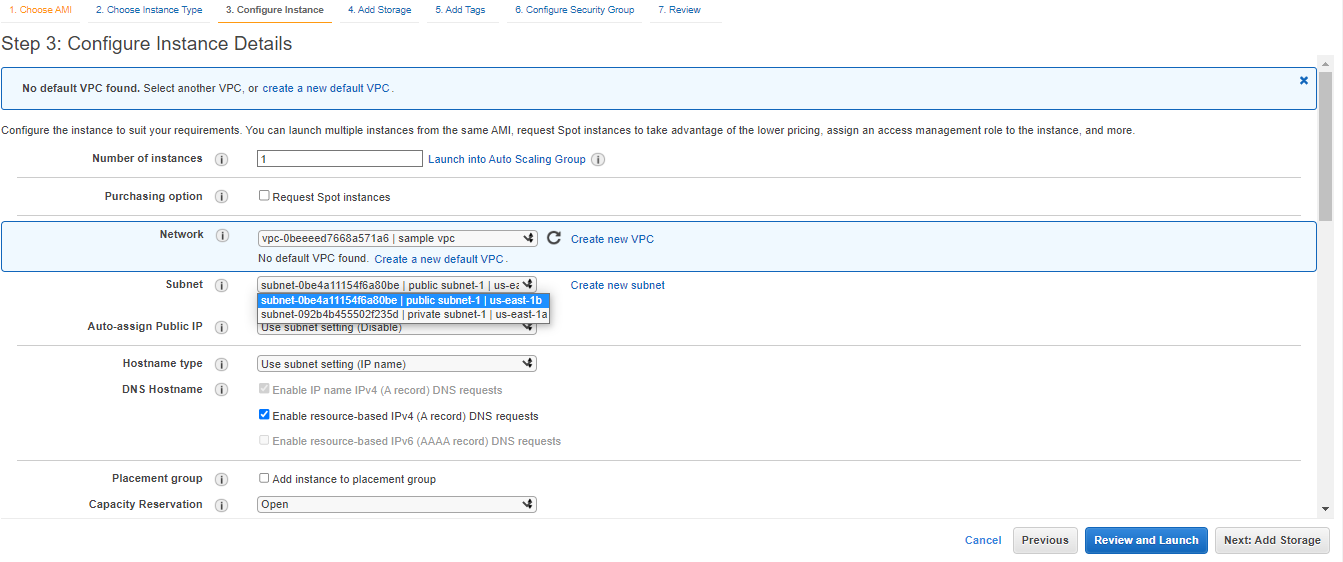
But here are a few steps: On the AWS management console, click on EC2 and commence the process. On step 3: Configure Instance Details, you will notice that the VPC and subnet has been automatically refreshed, although you can still manually switch to whichever one you want.
Also enable Auto assign public IP, then proceed.
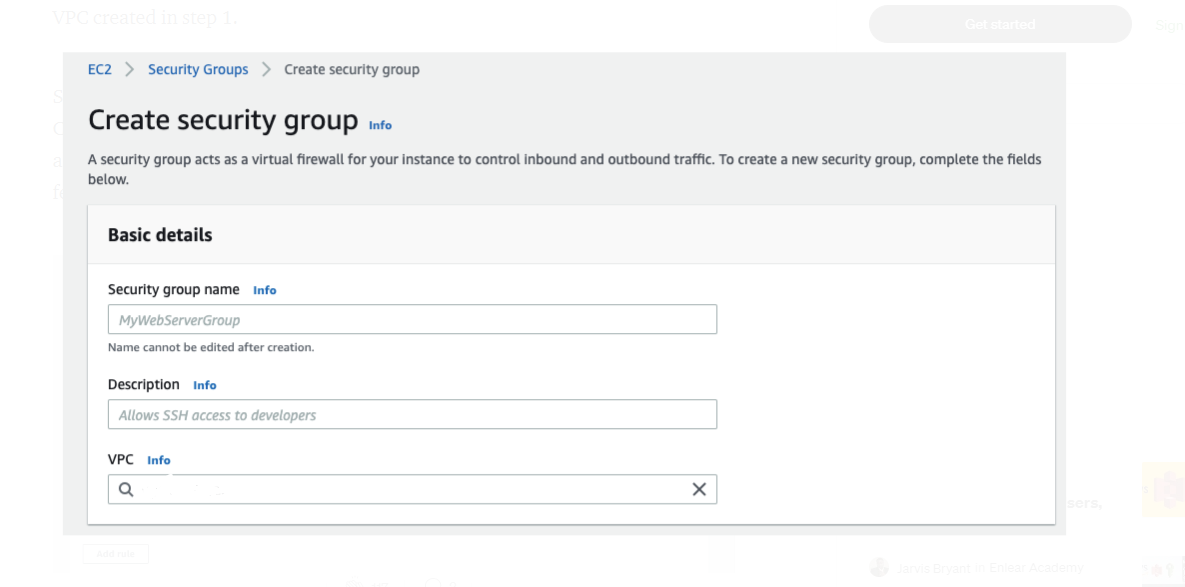
Create a public security group A public security group is needed to make your EC2 instances accessible. Go to EC2 -> Security Groups — Create security group. Enter a name and select the VPC created in step 1
- Click on Add rule
- Select HTTPS for type and Source “Anywhere-IPv4”.
- Choose Create security group button
A security group has now been created therefore allowing HTTPS traffic, which enables you launch instances that you want to be accessed publicly.
CONCLUSION
Congratulations you have just successfully created a whole environment on AWS. You can now understand practically the concept of VPC, it is where you provision your resources in public and private subnets, depending upon their accessibility.
I hope you have found this useful, thank you for reading and please leave a comment if you have any questions.


