
Install and Configure Apache Webserver on AWS EC2 Instance and Create An Image From it.


OBJECTIVE
By the end of this article, you will be able to:
- Understand the concept and importance of Apache
- Differentiate between Apache and Tomcat
- Launch an instance and install the webserver on your own instance
WHAT IS APACHE WEBSERVER?
Apache is a popular open-source, cross-platform web server that delivers web content and allows users to deploy their websites on the internet.
A major importance of Apache is its ability to handle large amounts of traffic with minimal configuration. It scales easily, also with its modular functionality at its core, Apache configuration is very flexible and customizable to one's desire.
Apache Web Server vs Tomcat
One major challenge I encountered as a beginner learning to install Apache webserver for the first time was being able to differentiate between Apache and Tomcat. Along the line, I ended up installing both before learning to understand their differences, so lets quickly address the topic before getting into the subject of the article. We would differentiate Apache and Tomcat based on:
Definition: Apache Web server is a free and open source web server that displays web content through the internet meanwhile Tomcat is also an open source platform and a matured Java servlet container which helps to install various Java enterprise specifications such as websites, API, JavaServer Pages (JSP), Java Servlets etc.
Usage – Tomcat is majorly used to host code that is based on Java. While, Apache HTTP can be used to host applications coded from any programming language such as Java, Python etc.
According to Hitesh Jethva, in his article Apache Web Server vs Tomcat – What is the Difference? (Pros and Cons) he concluded that If you are looking at high speed and more configurability, then Apache web server will be the best option for you, but if you are preferring Java over C programming language, then we suggest you go for Tomcat. Therefore there isn't one that's better than the other, its only a matter of preference.
Well its clear in this case that we are installing Apache webserver so lets get into it.
Installing Apache Webserver
They are many ways one could install Apache webserver but considering the context of this article or the beginner who is reading this article, we would rather demonstrate a fundamental sequence of steps which will follow this outline:
- Launch Instance from EC2 dashboard on AWS.
- Install Apache software on the Instance.
- Start the webserver services.
- Create AMI
Launch Instance from EC2 dashboard on AWS
Once you are on your AWS management console, first thing to do is to make way to your EC2 dashboard in order to launch your instance and follow the steps carefully, I have previously written a detailed article on how to launch an instance on AWS management console. and I will link the link below:
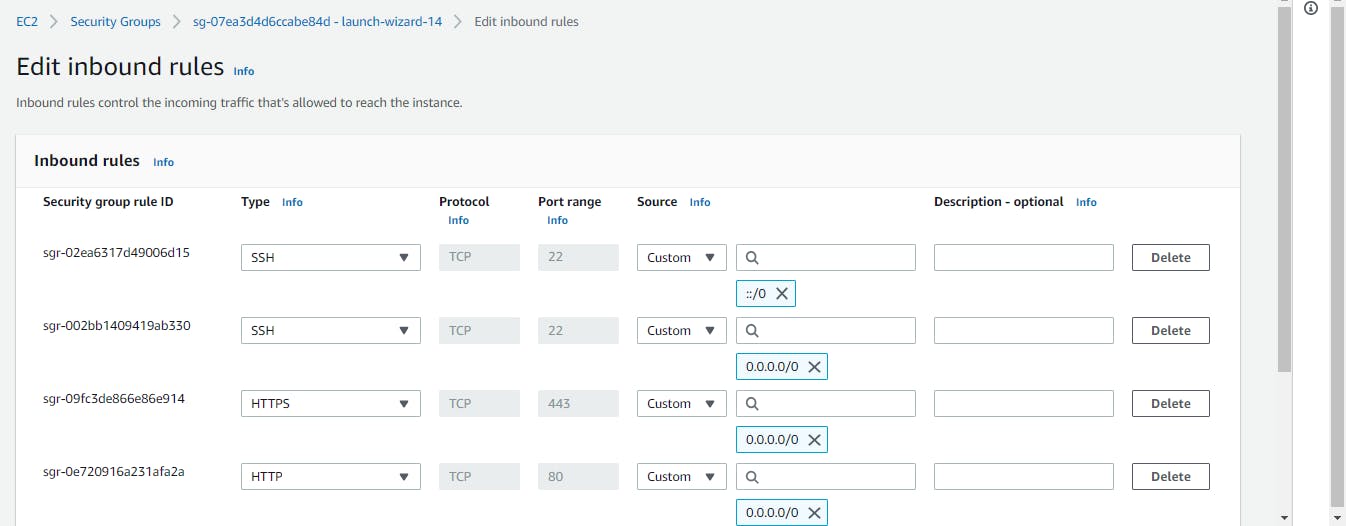
Following the steps in this link will gradually bring you to the finish-line of the first step of our present article, however there's one important addition we will make to that so pay attention. When adding the security group, its important to add port 443, in order to access our webserver over HTTPS by clicking on add rule.
And when you have successfully launched your instance, bear in mind that there's an on-going standing ovation right now as we progress to the next phase!

Install Apache software on the Instance.
Back at the instance dashboard, we click on 'connect' to progress to the instance terminal. On the connect page, ensure your Username says 'ec2-user', then click on 'connect'.

The next big step we will take is running these commands below accordingly to install the Apache webserver:
- sudo su - to switch from EC2-user to root user.
- yum install httpd -y.- to install Apache web server
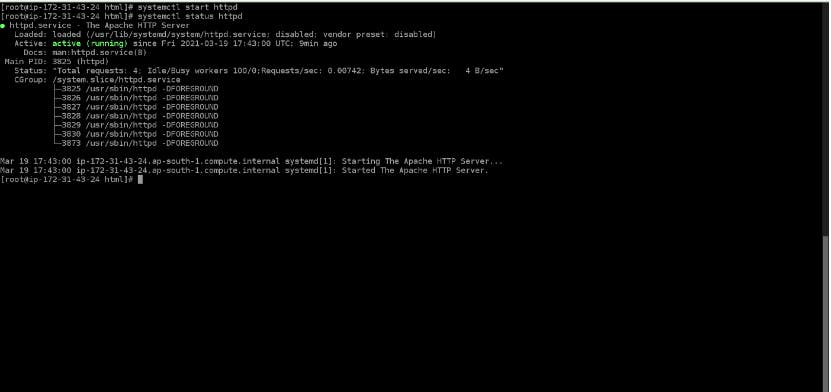
- systemctl start httpd- to start the Apache webserver services
- systemctl status httpd - to see status of webserver. At the end of the day, what you should have is an active running server similar to the one shown below:
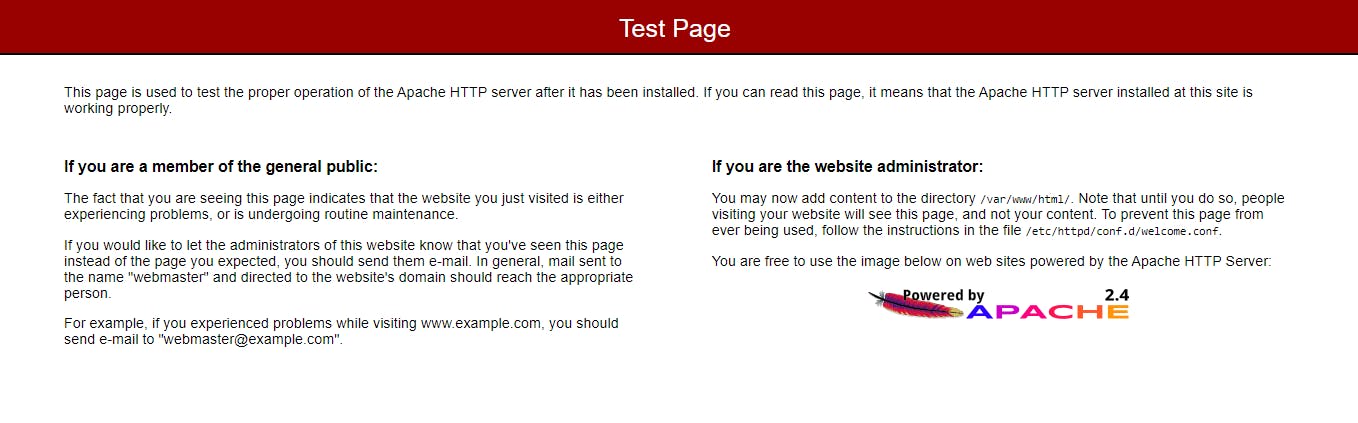
Now go back to the instance, copy your public IP address and paste it on your browser. Our webserver has launched successfully.
Create AMI
Lastly we proceed to create an AMI using these few steps:
- Go to the EC2-instance dashboard
- select your instance
- click on Actions
- select create image
In my case, here's what I have:
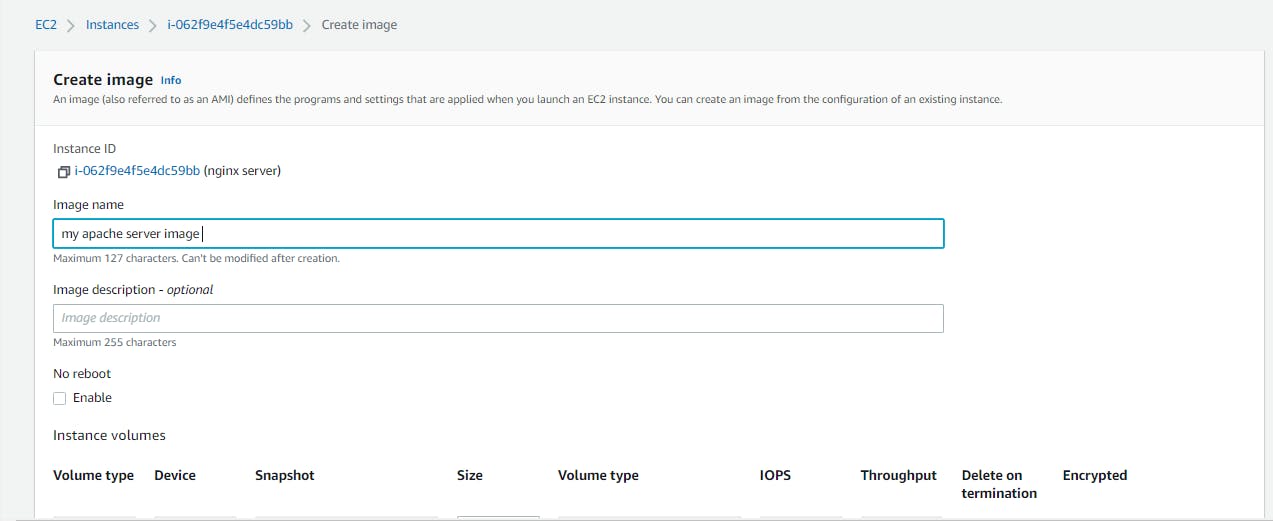
Finally click on 'create image" and we have successfully created Apache webserver AMI.